When most people interact with OpenShift and OpenShift Virtualization, especially when they first start out, they are using the “Console” web UI. However as your experience with OpenShift and OpenShift Virtualization grows, you will probably want to start interacting with the platform and your VMs via the command line. In this blog post we will cover the use of the oc command as well as the virtctl command to manage your VMs and how to connect to them remotely with minimal use of the OpenShift console.
Requirements
We will be making use of the oc and virtctl commands in this blog post. We will also use one additional tool, a “vncviewer”. Below you will find a link to download RealVNC, however any VNCviewer will work, as long as the vncviewer program is in your path and named as such.
NOTE: Other VNC viewers may work, but they must be called “vncviewer” and support the same options that RealVNC supports. You can test your vncviewer by opening a command prompt and running
vncviewer. As long as the command starts, you should be able to use the client withvirtctl.
It is also possible to download the virtctl and oc commands directly from the OpenShift UI. Log into your OpenShift Console, and in the upper right hand corner, select the "?" and then “Command Line Tools”. From here you can download command line tools that can be used to manage your OpenShift cluster and any additional Operators that have been installed on your cluster.

Logging in from the console
The first step to using the command line tools will be to log into your OpenShift cluster. There are three ways to log in on the command line.
- Copy login from the Web UI
oc login --web- this method will work for all authentication methodsoc login -u- this method will work only for [kubeadmin], [htpasswd], and [ldap] authentication types
Which one you choose will be dependent on how your cluster authentication is configured and your personal preferences.
Login from Web UI
If you are logged into the OpenShift Console, you can get a login token from the UI. Select your username from the upper right hand corner and then select “Copy login command”. You will be prompted to login again, and then given a token login that can be copy/pasted into your console to log into OpenShift via the command line.

Login with Username and Password
From the command line, you have two ways to log in. The first is to use the oc login -u <username> <clusterAPI hostname>. This will allow you to login to your cluster using a username/password. This login method only works for login methods that directly leverage the OpenShift platform for login. Examples of this are kubeadmin, htpasswd, and ldap.
PS C:\Users\markd> oc login -u kubeadmin https://api.sno.example.com:6443
WARNING: Using insecure TLS client config. Setting this option is not supported!

Console URL: https://api.sno.example.com:6443/console
Authentication required for https://api.sno.example.com:6443 (openshift)
Username: kubeadmin
Password: ********************

Login successful.
Login from command line via Web Interface
For logging in to OpenShift for authentication methods that leverage OAUTH, and OpenID Connect you can use the oc login <clusterAPI hostname> --web command. This will open your default browser to a login window. Once you have logged in you will be returned to your command prompt to continue working with the tools fully logged in.
PS C:\Users\markd> oc login --web
WARNING: Using insecure TLS client config. Setting this option is not supported!

Opening login URL in the default browser: https://oauth-openshift.apps.sno.example.com/oauth/authorize?client_id=openshift-cli-client&code_challenge=VuNMGD9QBxpLa4CvtFicMwR5aWGCUDSTXfhMgg5-TuE&code_challenge_method=S256&redirect_uri=http%3A%2F%2F%5B%3A%3A1%5D%3A64897%2Fcallback&response_type=code
Login successful.
Switching Context
Now that we know how to log into a cluster, what happens when you want to manage multiple clusters at the same time. Do you need to continuously log into each cluster as you switch context between the different clusters. The answer is a resounding NO. We can Kubernetes “Context” and the oc config context commands to switch between different clusters, and even different users and projects within a cluster. Contexts are a tio of three things, a “namespace” (or project), a “cluster” and a “user account”.
To start lets find out our current context with the oc config current-context
PS C:\Users\markd> oc config current-context
myvms/api-acm-example-com:6443/markd@example.com
In the output above, you will see that we are on the “myvms” Project, on the cluster “api.acm.example.com”, with the user “[email protected]”. We can see what additional contexts may be available with oc config get-contexts
PS C:\Users\markd> oc config get-contexts
CURRENT   NAME                                                 CLUSTER                    AUTHINFO                                     NAMESPACE
          default/api-acm-example-com:6443/xphyr               api-acm-example-com:6443   xphyr/api-acm-example-com:6443               default
          default/api-acm-example-com:6443/markd@example.com   api-acm-example-com:6443   markd@example.com/api-acm-example-com:6443   default
          default/api-sno-example-com:6443/markd@example.com   api-sno-example-com:6443   markd@example.com/api-sno-example-com:6443   default
*         myvms/api-acm-example-com:6443/markd@example.com     api-acm-example-com:6443   markd@example.com/api-acm-example-com:6443   myvms
          myvms/api-sno-example-com:6443/markd@example.com     api-sno-example-com:6443   markd@example.com/api-sno-example-com:6443   myvms
Notice in the example output above how you can have multiple contexts that are on the same cluster. This gives you the ability to interact with the Kubernetes API with different “personalities” depending on your privilege needs.
To switch from one context to the next use the oc config use-context <context name> command:
PS C:\Users\markd> oc config use-context myvms/api-acm-example-com:6443/markd@example.com
Switched to context "myvms-acm".
Having to type out that really long context name every time you want to switch contexts would be “sub-optimal” long term, so let’s rename the context to something easier to use:
PS C:\Users\markd> oc config rename-context myvms/api-acm-example-com:6443/markd@example.com myvms-acm
Context "myvms/api-acm-example-com:6443/[email protected]" renamed to "myvms-acm".
We can now switch to that context with the much shorter command oc config use-context myvms-acm.
Combining the oc login commands from above with the oc config context commands here will allow you to move between clusters with relative ease. Now lets talk about the virtctl command…
Interacting with Virtual Machines
Now that we are logged in, and we know how to switch between clusters, we will start to use the virtctl command to interact with the VMs in the cluster. The virtctl command can be used to manage and control virtual machines within OpenShift. The virtctl command makes use of the authentication set up by the oc command, so you need to ensure that you are logged into a cluster first with the oc command and set your appropriate context before using the virtctl command.
We will not go over all of the virtctl commands as a part of this blog post. We will only scratch the surface of what is possible, covering how you can connect to the Virtual machines either through the serial console, or the graphical console. We will also touch on how to use the “standard” remote management tool for Linux ssh and Windows rdp leveraging the virtctl command when your VM is only using the “pod-networking” network.
Connecting to the Serial Console
The serial console is used mainly by Linux (and other *inx like OSes) as the simplest form of console for access to the OS. In many cases it is used for debugging output and crash information, but some OSes will make it available to log into the OS for management. To access the serial console use the virtctl console <vmname> command:
PS C:\Users\markd> virtctl console fedora-vpn-test
Successfully connected to fedora-vpn-test console. The escape sequence is ^]

fedora-vpn-test login: markd
Password:
[markd@fedora-vpn-test ~]$
Connecting to the Graphical Console (VNC)
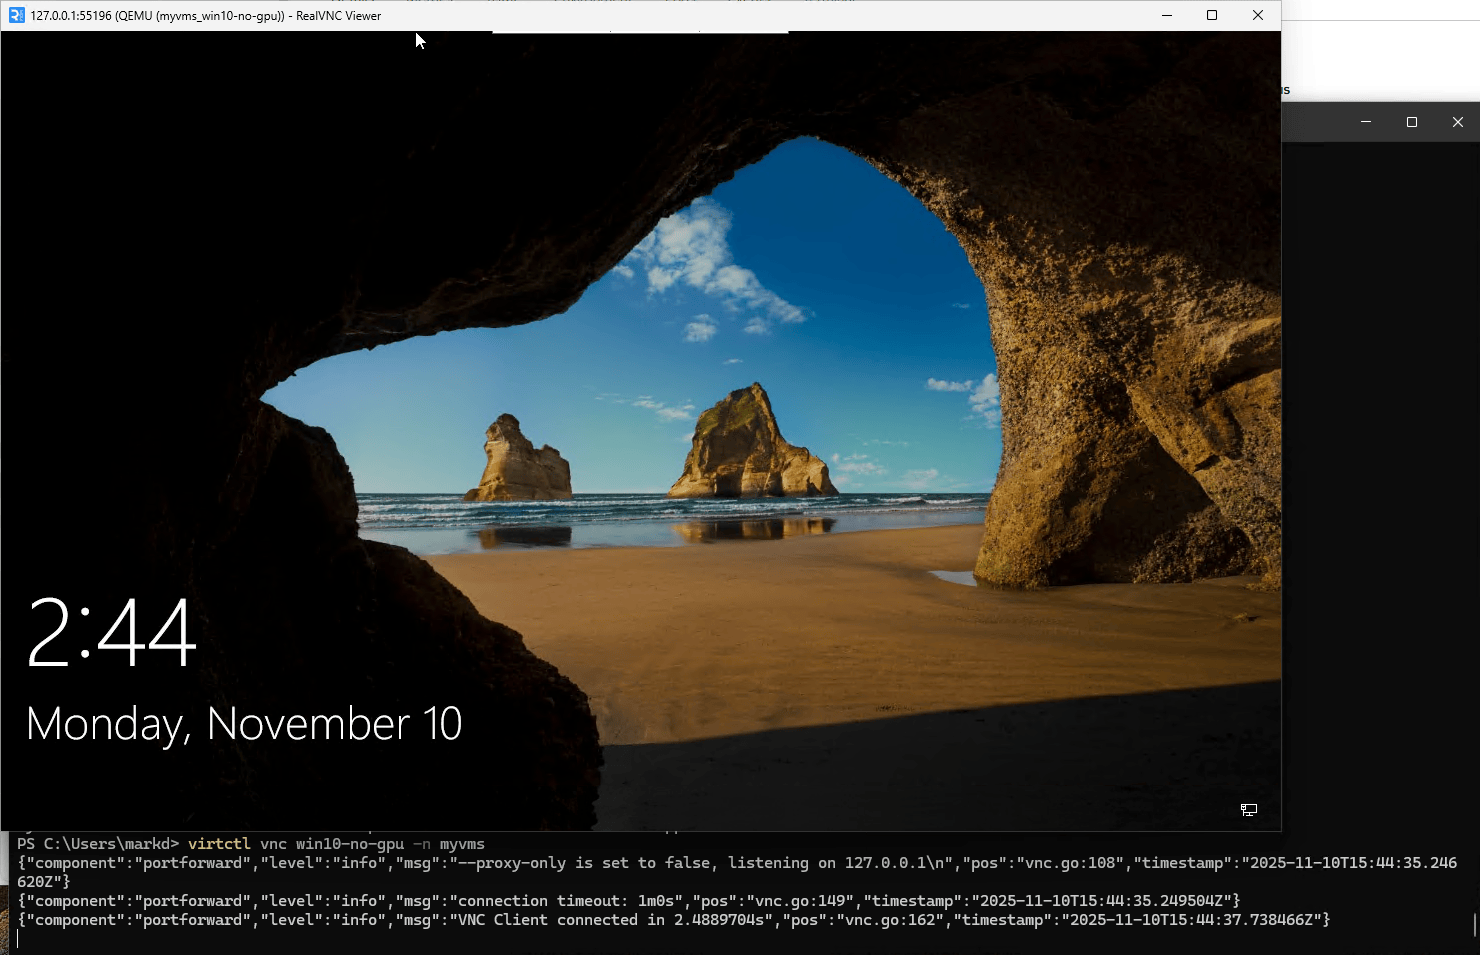
So what about Windows and other graphical only OSes? How do we connect to the console of those machines? We can use the virtctl vnc <vmname> command to connect to these consoles:
PS C:\Users\markd> virtctl vnc win10-no-gpu -n myvms
{"component":"portforward","level":"info","msg":"--proxy-only is set to false, listening on 127.0.0.1\n","pos":"vnc.go:108","timestamp":"2025-11-10T15:44:35.246620Z"}
{"component":"portforward","level":"info","msg":"connection timeout: 1m0s","pos":"vnc.go:149","timestamp":"2025-11-10T15:44:35.249504Z"}
{"component":"portforward","level":"info","msg":"VNC Client connected in 2.4889704s","pos":"vnc.go:162","timestamp":"2025-11-10T15:44:37.738466Z"}
NOTE: If you look closely at the command used above, you will notice that I included
-n myvms. If you are familiar with how to use theoccommand you will recognize that this references the Namespace called myvms. This shortcut allows you to connect to any VM you have permission to access from any namespace, regardless of your current context.
Connecting to Linux SSH Host
For hosts with SSH installed, you can use the virtctl ssh command to connect to the VM. This command is particularly useful if you are using “pod-based” networking as you do not have to create a SSH node port, or set up a secondary network to connect to your VM.
$ virtctl ssh markd@fedora-vpn-test.<namespace>
Warning: Permanently added 'vmi/fedora-vpn-test.<namespace>' (ED25519) to the list of known hosts.
Last login: Fri Nov  7 20:17:09 2025 from 192.168.6.22
NOTE: When connecting via SSH you can specify the namespace of the VM you wish to connect to as part of the name as seen above or by specifying the namespace directly such as
virtctl ssh markd@fedora-vpn-test -n <namespace>
Connecting to Windows Host over RDP via virtctl
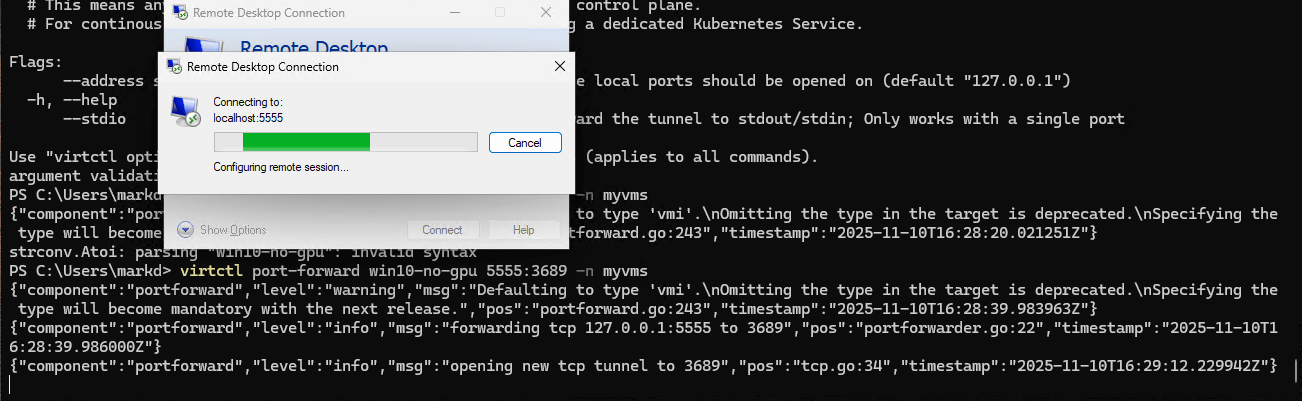
Since we covered connecting to a host via SSH, this blog post would not be a complete without also covering the “ssh equivalent” for Windows known as Remote Desktop Protocol or RDP. Assuming that you have enabled RDP on your Windows VM, you can connect to the RDP port of your vm using Port Forwarding via virtctl port-forward <vm name>.<namespace> <localport>:<remoteport>. For example, lets set up a Port forward from localport 5555 to remote port 3689 (the RDP port).
PS C:\Users\markd> virtctl port-forward win10-no-gpu 5555:3689 -n myvms
{"component":"portforward","level":"warning","msg":"Defaulting to type 'vmi'.\nOmitting the type in the target is deprecated.\nSpecifying the type will become mandatory with the next release.","pos":"portforward.go:243","timestamp":"2025-11-10T16:28:39.983963Z"}
{"component":"portforward","level":"info","msg":"forwarding tcp 127.0.0.1:5555 to 3689","pos":"portforwarder.go:22","timestamp":"2025-11-10T16:28:39.986000Z"}
{"component":"portforward","level":"info","msg":"opening new tcp tunnel to 3689","pos":"tcp.go:34","timestamp":"2025-11-10T16:29:12.229942Z"}
WARNING: virtctl port-forward sends all traffic over the Kubernetes API Server. This means any traffic will add additional pressure to the control plane. For continuous traffic intensive connections, consider using a dedicated Kubernetes Service.
We can use the Windows “Remote Desktop Connection” application to connect to “localhost:5555” which will be securely connected to the remote VM on port 3689, giving us an RDP connection.
Conclusion
This blog post only scratches the surface of how you can interact with OpenShift and your virtual machines from the command line with the virtctl command. Other notable commands such as virtctl vmexport, which allows you to export a VM from the cluster and virtctl usbredir which allows you to connect a local USB device to the remote VM are commands for you to explore on your own, or for a future blog post. For a full list of all the virtctl commands run virtclt --help and review the options you have available.