Now that you are using OpenShift Virtualization, you are undoubtedly looking to run more than just the Linux VMs that come with OpenShift Virtualization. I am guessing (especially if you landed here from a web search) that you are trying to figure out “HOW DO I INSTALL WINDOWS?”. Great, you are in the right place! This blog post will walk you through the entire process, from Booting from an ISO image, to customizing the Windows VM and finally turning it into an OpenShift Template.
We will follow a very MANUAL process to do the install, this will allow you to see how the process works so you can apply it to other OSes, not just Windows. There are automated processes available as well such as the OpenShift Pipelines Golden Image Pipeline, but they require additional setup to function. This is going to be a manual “quick and dirty” process to get you going quickly.
In this post we will install Windows Server 2025 from an ISO downloaded from Microsoft. The process, screenshots and eventual YouTube video will show Windows Server 2025, BUT the process will work for any modern Windows OS, including Windows 10, Windows 11 and Server 2022.
Prerequisites
Before proceeding, you will need the following:
- OpenShift Cluster installed and functioning (examples/screen shots are based on OCP 4.17)
- OpenShift Virtualization installed
- Admin privileges on your OpenShift cluster
- Some form of storage configured on your cluster
- One or more Windows ISO images to start the build process from
You will need to ensure that you have all the above before proceeding.
Creating our first Windows VM from ISO
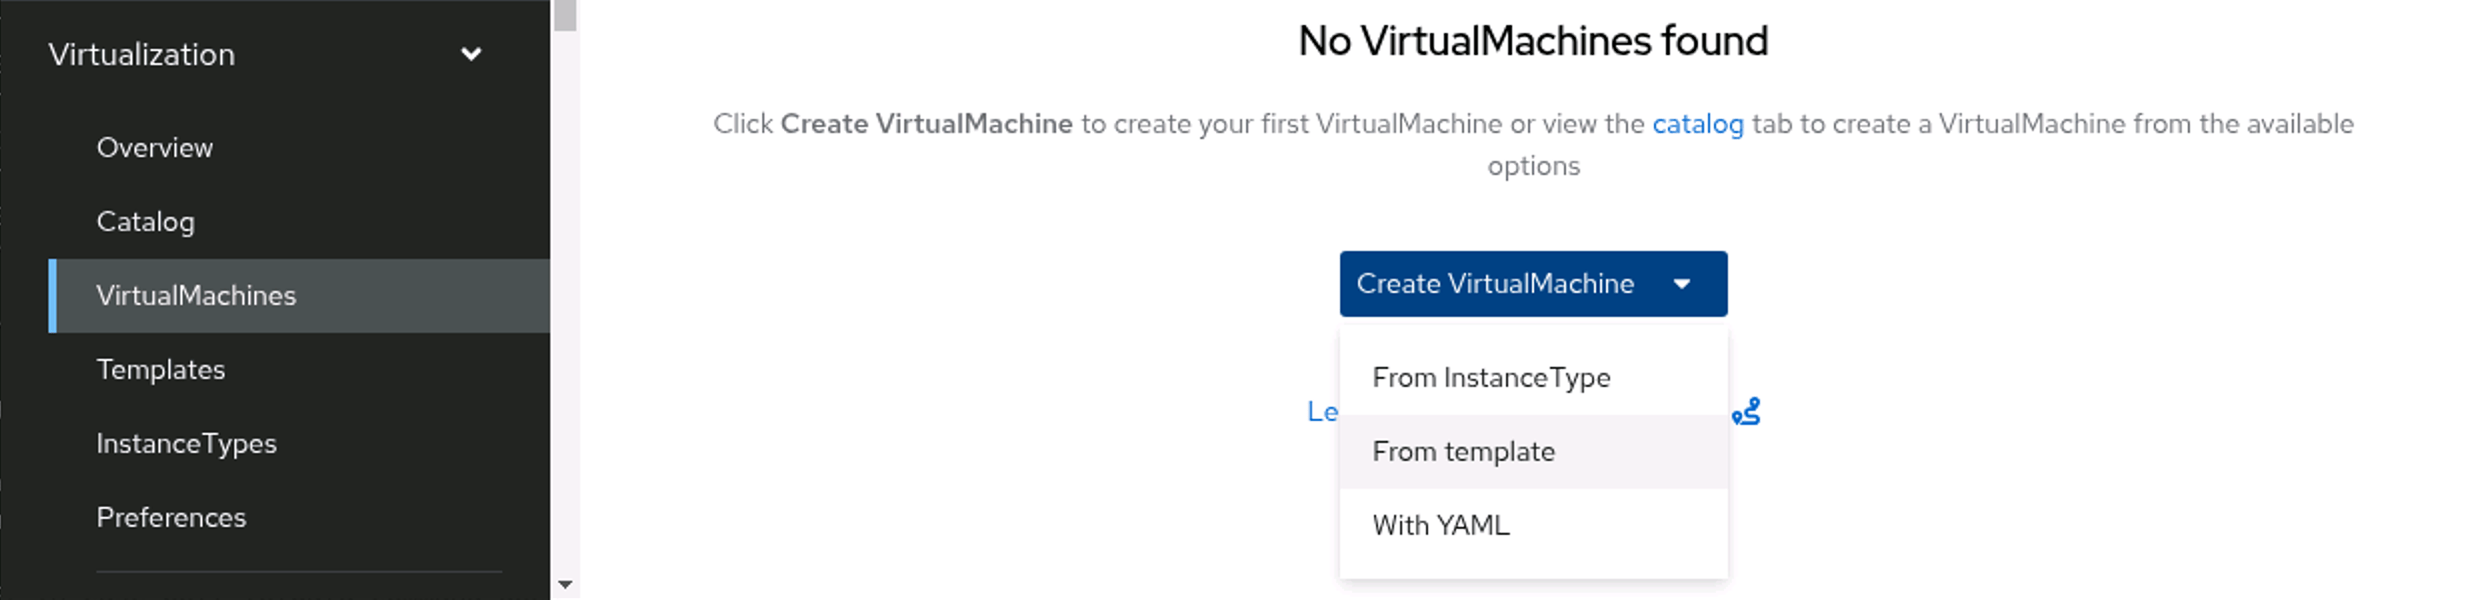
- Log into OpenShift and select: Virtualization->VirtualMachines
- Select the Project you want to build your VM in or Create a new project if one does not exist (we will use winsrv25)
- Select “Create->From Template”
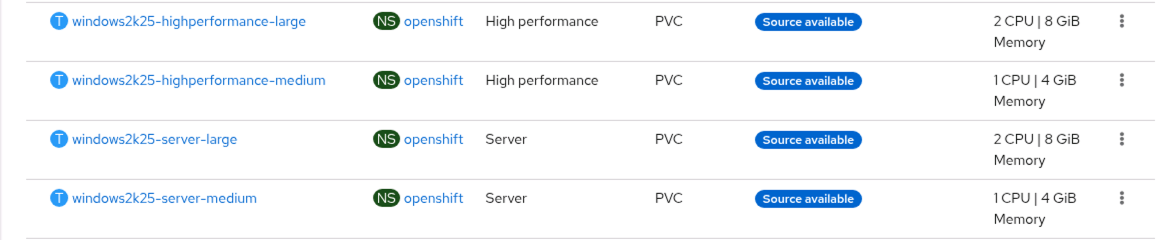
- Select the version of Windows you want to install
- Select “Boot from CD”
- For CD Source select “Upload (Upload a new file to a PVC)”
- Browse and select the ISO you want to build from
- Set the disk size as appropriate
- Leave disk source as “Blank”
- Ensure that “Mount Windows drivers disk” is checked
- Click “Quick create Virtual Machine
At this point, you will need to wait for your ISO image to upload. When the upload completes, you will be taken to the new VM.
Installing Windows
With your new VM booted up, connect to the VM Console by clicking “Open web console.” You will need to ensure that you “Press any key to boot from the Install media” or the boot will fail.

From here you should follow the normal Windows install path. Windows should automatically find the proper disk drivers to do the OS install.
Install the Guest Agent
Once the install completes, and you set a username/password, log into your new Windows VM. From here, we are going to do a little more customization, that will optimize how your VM runs in OpenShift.
- Open File Explorer, and select the CD drive with volume name “virtio-win”
- Select the folder called “guest-agent”
- Run the “qemu-ga-x86_64” installer
The installer will run a silent install, and quit without any notification. You can now move onto installing the additional drivers.
Install Additional Drivers
OpenShift Virtualization presents some additional hardware that helps enhance your Windows experience from within OpenShift. We will need to install these drivers to complete the install process.
- In the Windows VM Run “Device Manager”
- For each device that shows a Yellow Triangle do the following:
- Right Click the device and select “Update Driver”
- Click “Browse my computer for drivers”
- Select the “Virtio-win” drive
- Ensure “Include subfolders” is selected
- Click “Next”
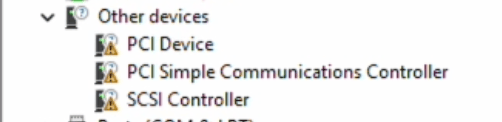
Windows will automatically find the required driver, and install it. Repeat this process until all the devices are recognized and you do not see any yellow triangles next to your devices.
Remove Install CD and Drivers ISO
The final step is to power down your VM and remove the install ISO.
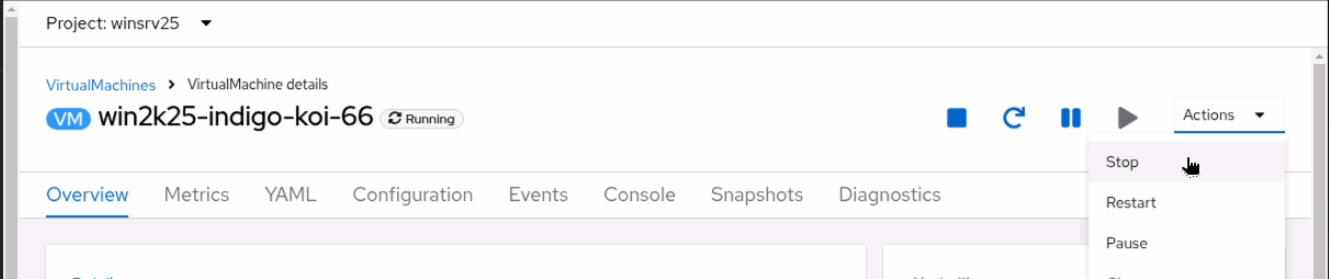
- From the OpenShift Console, select “Actions -> Stop” to shut down the VM
- When the VM is powered off, select “Configuration” and then storage
- Using the “three dots” to the right side of the screen select “detach” for both the “installation-cdrom” and the “windows-drivers-disk”
- Start the VM
At this point, your VM is ready for use. However, what if you want to create many Windows VMs. You don’t want to go through that process every time you create a new Windows VM. Don’t worry, OpenShift Virtualization can help. The next section will show you how to quickly Sysprep your Windows VM, and then create a OpenShift Windows Template, so you can easily clone/copy this VM and make many more instances of it.
Creating a VM Template in OpenShift Virtualization
So lets go for the BONUS ROUND. We are going to take the VM that we just created, and turn it into a template that can be used for creating additional VMs, without the need to go through the entire install process. To do this, we will leverage Microsoft Sysprep to put our VM in a “clean” state.
Sysprep the image
- Boot the VM we created in the previous section and log in.
- From the “Windows Menu”, find PowerShell and start PowerShell as an Administrator
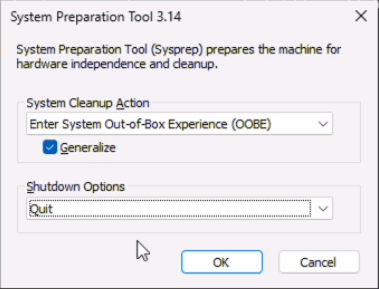
- Run the following command
c:\windows\system32\sysprep\sysprep.exe - Ensure that you select the following options per the screenshot below:
Once the sysprep utility finishes, switch back to the OpenShift Console, and select “Actions->Stop”
Update the Windows Template to use the sysprep’d image
In the OpenShift console select “Virtualization->Templates”
Scroll through the list of templates, and select a template for the version of Windows you just created a VM from (eg. Windows 2025)
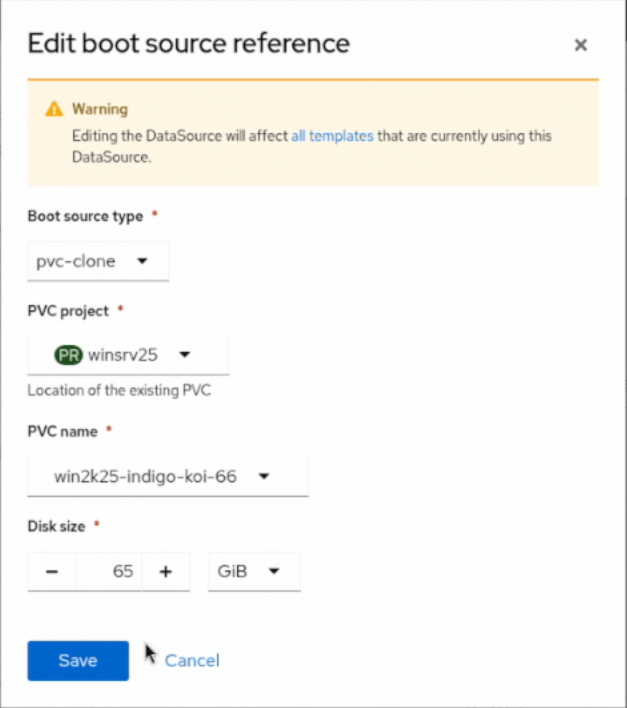
In the upper right hand side, select “Actions->Edit boot source reference”
Set the Boot source type to PVC Clone
Select the SOURCE project where you built the Windows VM earlier (eg. winsrv25)
Select the PVC Name of the boot disk for your VM.
Set the Disk Size this should the be the same size or Larger than your source VM
Click Save

At this point OpenShift will work to make a clone of your source VM. This will take some time, you can check on the status from the command line with:
oc get datavolumes -n openshift-virtualization-os-images -w
When the cloning is complete, all the Windows templates that use that version of Windows will show as having a boot source:
Creating new VMs from our Template
We have arrived at the last step. Its time to create new VMs from our template.
- In the OpenShift console select “Virtualization->VirtualMachines”
- Select “Create->From Template”
- Select the “Microsoft Windows Server 2025 VM” (or whichever template you created previously)
- Select “Quick create VirtualMachine”
Watch in wonder as OpenShift creates you a new VM from the template you created and starts it for you.
Conclusion
This blog post has covered a lot of ground. We created a Windows VM from an ISO image using OpenShift Virtualization. We customized and optimized the VM to run efficiently under the OpenShift Virtualization hypervisor, and finally we turned that VM into a template image that can be used to create 100s or 1000s of Windows vms seamlessly within OpenShift Virtualization.
There are other topics that were not covered here, such as adding a unattend.xml file to automate the customization of the Windows VM after creation. There is also a OpenShift Pipelines (Tekton) Pipeline available that can automate all of the steps that we just went through above. Be sure to check out those links to further your OpenShift Virtualization journey!