In a previous blog post Managing Secrets in OpenShift with Infisical, we walked through the process of configuring the Infisical Secrets Operator in OpenShift. The Infisical Secrets Operator allowed us to access secrets managed by Infisical from within OpenShift. But what if you want to host the Infisical application yourself, instead of relying on the Saas version, well then this post is for you. In this post we will talk about deploying the Infisical application itself, so that you can run a local instance of Infisical and keep all your secrets safe.
Infisical comes with instructions for deploying it on a Kubernetes cluster however the default values used will not work with OpenShift. With a few changes to the helm values file, we can fully deploy Infisical with no changes to the containers.
We will use either GitHub, or Google for our authentication. Either (or both) will work with this setup. While there are other authentication options for Infisical, we will focus only on these two auth methods.
One other thing to note, we will not be configuring a SMTP server for this install, however if you want to take full advantage of Infisical, you will need to configure email.
DISCLAIMER: Use this guide to help you get going with Infisical on OpenShift, however I am not responsible if you follow the instructions here and then loose all your production secrets based on something I outlined here. You have been WARNED.
Prerequisites
In order to follow the steps outlined in this post you will need the following:
- OpenShift 4 cluster - tested with OCP 4.13
- Helm 3
- Oauth account setup - See Google or GitHub sections below
- A default storage provider configured for persistent storage of the MongoDB and Redis data. See OpenShift Container Platform storage overview for additional details.
You will also need to know what your wildcard DNS name is for your OpenShift cluster. We will be using this to create the URL for the Infisical app. Your wildcard DNS name can be found by opening the OpenShift console and looking at the URL. Your console url will look something like: https://console-openshift-console.apps.ocp.example.com The section .apps.ocp.example.com is your wildcard DNS name.
We will create our new hostname by combining the name infisical with the wildcard DNS name eg. infisical.apps.ocp.example.com
For the rest of this post, we will use infisical.apps.ocp.example.com as the host name and refer to it as <infisical_host_name>. Be sure to update this and use your host name when creating the helm_values.yml file later in this post.
Configuring your Selected OAuth provider
We can deploy Infisical with either Google OAuth or GitHub OAuth for authentication. Follow the instructions for your choice in OAuth provider, and then move onto the Putting it all together section.
When configuring either OAuth type, you will need the following information (be sure to update the URL to match the hostname you will be using):
- Homepage URL = https://infisical.apps.ocp.example.com
- GitHub call back URL = https://infisical.apps.ocp.example.com/api/v1/sso/github
- Google call back URL = https://infisical.apps.ocp.example.com/api/v1/sso/google
Creating Google Auth Login
If you want to use Google for your auth provider follow the steps here: Setting up OAuth 2.0 to create an OAuth application.
Be sure to record the following information (example values shown below):
- CLIENT_ID_GOOGLE_LOGIN: 283731-m0b3lo.apps.googleusercontent.com
- CLIENT_SECRET_GOOGLE_LOGIN: KDUEGS-WG41HNKs_wAXhuyW3MWESuLmqakT2
Creating GitHub Auth Login
If you want to use GitHub for your auth provider follow the steps here: Creating an Oauth App to create an OAuth application.
Be sure to record the following information (example values shown below):
- CLIENT_ID_GITHUB_LOGIN: 2937a4f1bcc5e4b
- CLIENT_SECRET_GITHUB_LOGIN: 524882b2243a0bb9926b4c43a08c
Putting it all together into a Helm values file
We will be using Helm to deploy the infisical application, and it’s required services such as Redis and MongoDB. Infisical leverages the Bitnami distributions of both of these apps, as a part of their Helm Chart. The Helm Chart has many options which can be defined in a values file and we will take full advantage of this to deploy successfully into OpenShift.
Specifically we will be “disabling” podSecurityContext and containerSecurityContext in the Helm charts for MongoDB, and Redis. This may seem counter-intuitive since usually we need to enable SecurityConstraints for applications to deploy in OpenShift, but in this case, the default settings used in the Helm chart are not restrictive enough. By removing the defaults from the template, we let OpenShift apply a set of defaults for constraints on the pods, and they will start up and run without issue.
We will also override the default ingressClassName to use the OpenShift router instead of NGINX. This will allow us to take advantage of the additional features that OpenShift routes provides, including automatically securing the application with the Wildcard TLS certificate present in the OpenShift platform.
Create a helm_values.yml file with the following contents, and be sure to update the backendEnvironmentVariables.CLIENT_ID_GITHUB_LOGIN and backendEnvironmentVariables.CLIENT_SECRET_GITHUB_LOGIN with the values that we got in the previous section Configuring GitHub Auth Login. If you are using Google auth, update the Google values instead, and be sure to remove the entires for the auth method you are not using.
frontend:
  name: frontend
  replicaCount: 2
  image:
    repository: infisical/frontend
    tag: "v0.36.2" # <--- frontend version
    pullPolicy: Always

backend:
  replicaCount: 2
  image:
    repository: infisical/backend
    tag: "v0.36.2" # <--- backend version
    pullPolicy: Always

backendEnvironmentVariables:
  HTTPS_ENABLED: true
  INVITE_ONLY_SIGNUP: false
  CLIENT_ID_GITHUB_LOGIN: <your_github_client_id>
  CLIENT_SECRET_GITHUB_LOGIN: <your_github_client_secret>
  CLIENT_ID_GOOGLE_LOGIN: <your_google_client_id>
  CLIENT_SECRET_GOOGLE_LOGIN: <your_google_client_secret>
  SITE_URL: "https://<infisical_host_name>"
  ## You will need to define SMTP servers to send email if you want a full working solution
  ## SMTP_HOST: ""
  ## SMTP_PORT: 587
  ## SMTP_SECURE: false
  ## SMTP_FROM_NAME: Infisical
  ## SMTP_FROM_ADDRESS: ""
  ## SMTP_USERNAME: ""
  ## SMTP_PASSWORD: ""

frontendEnvironmentVariables:
  SITE_URL: "https://<infisical_host_name>"

ingress:
  ingressClassName: openshift-default
  annotations:
    route.openshift.io/termination: edge
  hostName: "<infisical_host_name>"
  nginx:
    enabled: false

mongodb:
  enabled: true
  persistence:
    enabled: true
  podSecurityContext:
    enabled: false
  containerSecurityContext:
    enabled: false

redis:
  enabled: true
  master:
    podSecurityContext:
      enabled: false
    containerSecurityContext:
      enabled: false
NOTE: As of the publishing of this blog v0.36.2 was the latest release. There may be newer versions available. Be sure to check the Docker Hub Infisical page to validate the latest release, or use “latest” to live on the edge.
With our helm-values.yml created, we will install the helm chart, and then deploy the Infisical application:
$ helm repo add infisical-helm-charts 'https://dl.cloudsmith.io/public/infisical/helm-charts/helm/charts/'
$ helm repo update
$ helm install infisical-app infisical-helm-charts/infisical --values helm_values.yml
Now get the OpenShift Route that was created for us:
$ oc get route
NAME                      HOST/PORT                         PATH   SERVICES                 PORT    TERMINATION     WILDCARD
infisical-ingress-2szkl   infisical.apps.ocp.example.com   /      infisical-app-frontend   <all>   edge/Redirect   None
infisical-ingress-txbsk   infisical.apps.ocp.example.com   /api   infisical-app-backend    <all>   edge/Redirect   None
You can now connect to the Infisical application by opening your favorite web browser and going to the host name listed above (eg. infisical.apps.ocp.example.com). Be sure to use “https” as the protocol as we are taking advantage of that OpenShift wildcard route and certificate ensuring that our traffic is encrypted. You should now see the Infisical login page:
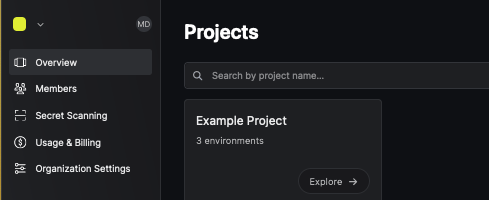
Since this is your first time logging into Infisical select “Create an account”, and then select “Continue with GitHub” or “Continue with Google” depending on which auth provider you configured as your login provider. You will be prompted to authorize the Infisical app, and then be asked for some additional information. Once you fill this in, you will be taken to the Infisical main page and you can start to store your secrets.
Removing Infisical
Since we used Helm to install Infisical, if you want to remove it from your cluster you can run the following commands:
$ helm uninstall infisical-app
These resources were kept due to the resource policy:
[Secret] infisical-app-backend
[Secret] infisical-app-frontend

release "infisical-app" uninstalled
This will leave behind the persistentVolumes that stored the data for MongoDB and Redis. If you want to fully delete/remove your Infisical instance you should also delete the PVCs.
WARNING: This will destroy all your saved data including all your Secrets, make sure you know what you are doing before proceeding with this step.
$ oc delete pvc/datadir-mongodb-0
persistentvolumeclaim "datadir-mongodb-0" deleted
$ oc delete pvc/redis-data-redis-master-0
persistentvolumeclaim "redis-data-redis-master-0" deleted
Conclusion
If you are looking for a way to host your own Secrets manager, Infisical is a great way to manage your application secrets and OpenShift is a great platform to host Infisical. If you want to try accessing secrets from applications hosted in OpenShift be sure to check the other blog post Managing Secrets in OpenShift with Infisical and try storing and accessing your secrets in OpenShift.

